

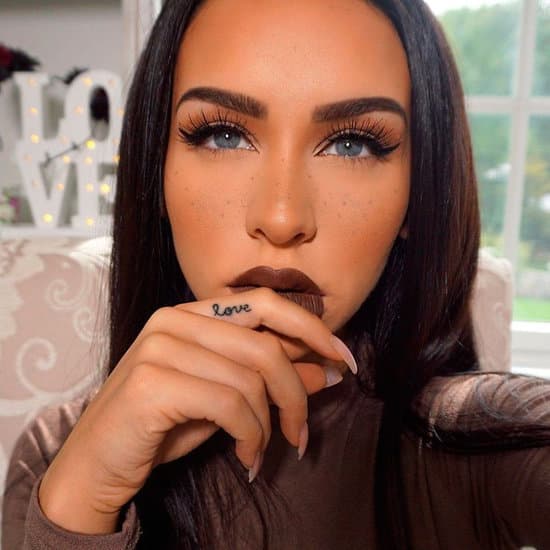
Natural-looking faux freckles are a fun way to give your makeup a fresh, youthful, and sun-kissed appearance. They can instantly brighten up your face, soften a look, and add dimension without much effort. Unlike permanent freckles, these are temporary, so you can experiment with placement, size, and intensity depending on your mood or the season.
Below are four popular methods for creating realistic freckles, with step-by-step instructions, extra tips, and guidance on how to make them look truly natural.
1. The Freckle Pen Method (Easiest + Most Natural)
Best for: Quick, realistic freckles that look effortless
Tools: Freckle pen
How to do it:
- Start by applying your base makeup as usual. Foundation, tinted moisturiser, or BB cream. A smooth, even base helps the freckles sit naturally on your skin.
- Lightly tap the freckle pen onto the areas of your face where the sun would naturally hit: Bridge of the nose, Upper cheeks
- Vary the pressure for different freckle sizes. Natural freckles aren’t uniform, so some should be faint while others slightly darker.
- Once you’ve applied your dots, lightly tap each one with your fingertip or a damp beauty sponge to blend it into your skin. This makes them look like they’re truly part of your complexion, rather than sitting on top of it.
- Set your freckles with translucent powder to make them last longer without smudging.
Pro tips:
- Freckles tend to be denser on the cheeks and spread out toward the sides of the face. Add fewer at the centre and more dispersed freckles toward the edges.
- You can layer a few freckles for depth, but avoid overdoing it, subtlety is key for a natural effect.
2. Eyeshadow + Thin Brush Method (Very Soft Effect)
Best for: Achieving a soft, blurred, sun-kissed look
Tools: Brown eyeshadow, setting spray, fine eyeliner brush
How to do it:
- Choose a cool- or neutral-brown eyeshadow. Warm tones can also work, depending on your skin undertone, but avoid shades that are too orange or red.
- Lightly spritz your fine eyeliner brush with setting spray to pick up pigment. This ensures the freckle stays in place longer.
- Dot the brush gently across your face in a random pattern. Don’t overthink it. Freckles are naturally uneven and scattered.
- Dab each freckle with your fingertip to soften any harsh edges and make them blend seamlessly into your skin.
- Finish with a light mist of setting spray to lock the freckles in place.
Pro tips:
- Mix two eyeshadow shades for dimension. A slightly lighter shade for subtle freckles and a darker one for more prominent spots.
- Try applying freckles to the nose, cheeks, temples, and even a few along the forehead for a sun-exposed effect.
- This method is ideal if you want a delicate, understated look rather than bold statement freckles.

3. Brow Pencil Method (Beginner-Friendly)
Best for: People who already use a brow pencil or want precise control
Tools: Fine-tip brow pencil
How to do it:
- Twist the pencil so that only the smallest possible point is exposed. The finer the tip, the more natural the freckle.
- Dot freckles in small clusters, ideally 3–7 freckles per cluster, to mimic how they appear naturally on skin.
- Apply varying pressure to create freckles of different intensity. Some should be faint, while others slightly darker.
- Tap lightly with a finger or sponge to blend and remove any overly sharp edges.
Shade tips:
- Use a pencil shade slightly lighter than your natural brow colour for the most realistic look.
- Avoid going too dark or uniform; natural freckles have subtle variations in tone.
Extra tricks:
- Focus most freckles on the bridge of the nose and cheeks but scatter a few along the jawline, temples, and forehead for added authenticity.
- If you want to make freckles more natural, apply lightly over a dewy or luminous base. Matte skin can make them appear too harsh.
4. Henna Freckles (Longer-Lasting: 3–7 days)
Best for: Semi-permanent freckles that last for several days
Tools: Cosmetic-grade henna
How to do it:
- Apply tiny dots lightly across the nose and cheeks using a cosmetic henna applicator. Start small, you can always add more.
- Leave the henna on for 10–20 minutes, depending on how deep you want the freckles to appear. Longer application generally results in darker spots.
- Gently wipe away the henna; the freckles will continue developing over the next few hours.
- Avoid washing your face with harsh cleansers the same day, as this can cause the freckles to fade faster.
Important safety tips:
- Always do a patch test before applying henna to your face to avoid allergic reactions.
- Use only cosmetic-grade henna. Cheap hair henna can contain chemicals that irritate facial skin.
Extra tips for realism:
- Don’t place dots too symmetrically. Natural freckles are random and irregular.
- Combine different dot sizes for a more varied and realistic look.
How to Make Your Faux Freckles Look Natural
No matter which method you choose, there are a few universal tricks to make freckles appear believable:
- Vary freckle size: Combine tiny and mid-sized dots. Natural freckles aren’t all the same size, and subtle variation gives a more authentic appearance.
- Scatter them randomly: Avoid lining up freckles in rows or predictable patterns. Irregular spacing mimics the randomness of sun-kissed skin.
- Include some “imperfect” freckles: Small smudges, slightly uneven dots, or faint marks can make freckles look genuine. Perfection can sometimes read as artificial.
- Concentrate freckles on the nose bridge: The sun naturally hits this area more, so denser freckles here look realistic.
- Add a few to the forehead and chin: A few carefully placed freckles outside the central area of the face can increase realism.
- Use more than one shade: Combining tones creates depth. Darker and lighter browns, or warm and neutral shades, will make freckles appear multidimensional.
- Always blot to remove harsh edges: After application, gently press a tissue or sponge over the freckles to soften the edges and blend them seamlessly into your skin.
Faux freckles are a playful and versatile beauty trick. They can complement a no-makeup look, add warmth to your complexion, or enhance a soft, glowy makeup aesthetic. With these methods, anyone can create freckles that suit their face shape, skin tone, and personal style.
Whether you choose a quick freckle pen for convenience, a soft eyeshadow technique for a subtle effect, a brow pencil for precision, or henna for longer-lasting freckles, experimenting with placement, size, and shade will allow you to achieve the most natural look. Remember, the key is subtlety, randomness, and blending. The closer your faux freckles mimic nature, the more effortlessly fresh and youthful your makeup will appear.
With practice, faux freckles can become a signature feature in your makeup routine, giving you that enviable sun-kissed glow all year round, without spending hours in the sun.
Youtube Tutorials
SEE ALSO:
5 GORGEOUS BRIDAL MAKEUP TUTORIALS
6 FALL MAKEUP LOOK TUTORIALS
This is a neat idea, I’d love to have some faux freckles for a night out sometime!!
Carrie
curlycraftymom.com
It’s so funny to me that this is a trend! But it’s definitely a thing right now! Some of these look so real! Great post.
~Melissa xx
https://freshairandfalselashes.com
lol…ikr
Cool I love it?
Xoxo
marisasclosetblog.com
Love this idea! Thanks for sharing these tutorials!
Jill – Doused in Pink
I didn’t realize freckles was a thing! Love the natural way they look in these tutorials.
https://www.kathrineeldridge.com
Haha I have freckles naturally and I remember being teased for them at school – now they’re a trend 🙂
Sarah xo Oomph London
Beautiful tutorials!!! Faux freckles are so in right now!! x
Yiota
PinkDaisyLoves
I also can’t believe that this is a trend. But the end results are so good.
xoxo
Lovely
http://www.mynameislovely.com
I didn’t know you could fake freckles, wow! I like my natural ones 🙂
Hope that you had a great weekend! We had our annual family photo with Santa for our Christmas cards on Saturday and then a playdate in the park on Sunday 🙂
So neat! I have freckles more in the summer, this is great to help them stand out more in the winter!
This is quite an intriguing tutorial. Thanks for sharing dear!
Jessica | notjessfashion.com